Showing posts with label GIMP 2.4 Tutorial. Show all posts

Thursday, September 18, 2008

GIMP Digiscrapping Tutorial - "How to use Photo Masks in Gimp"

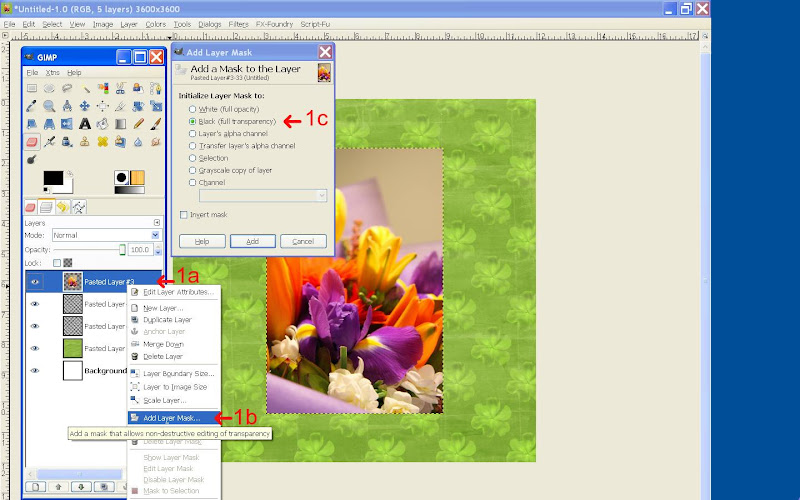
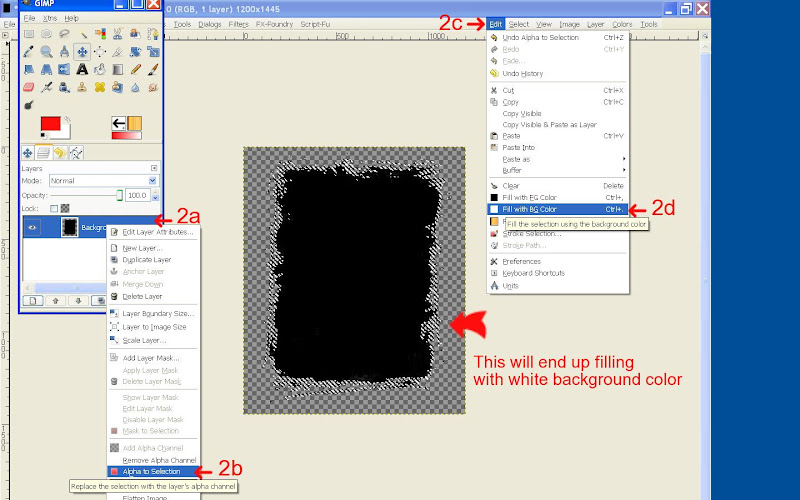
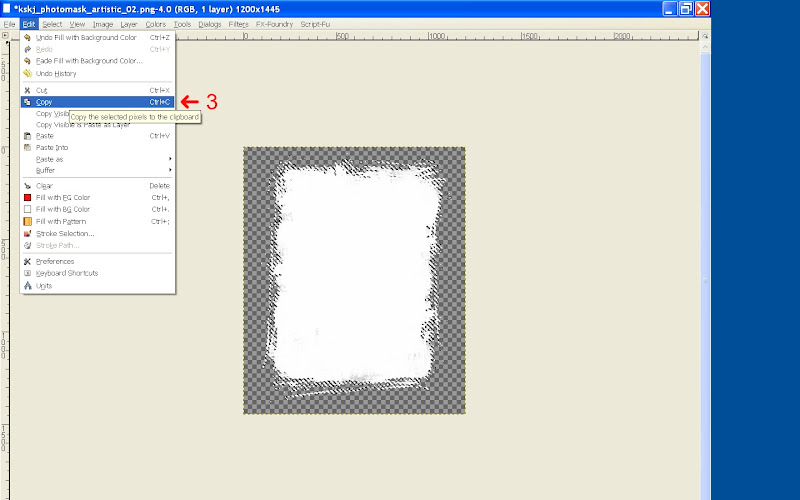
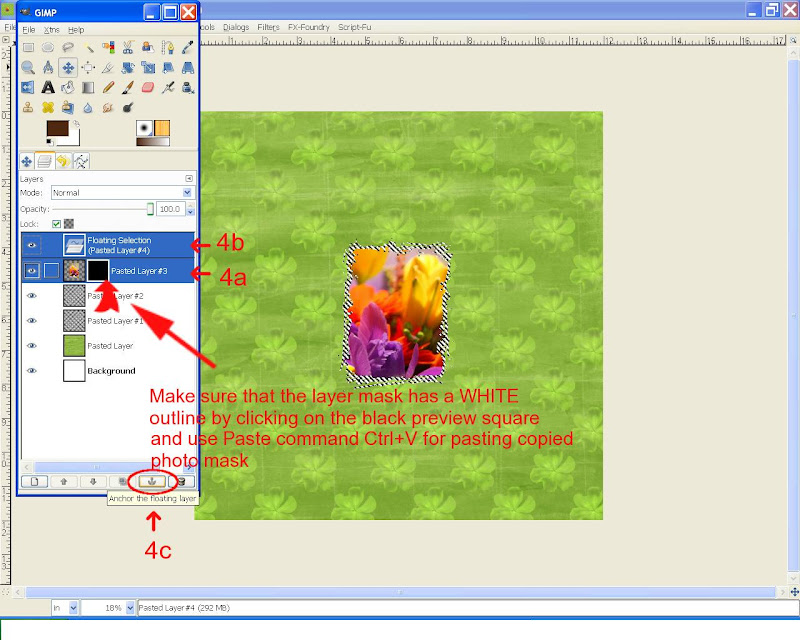
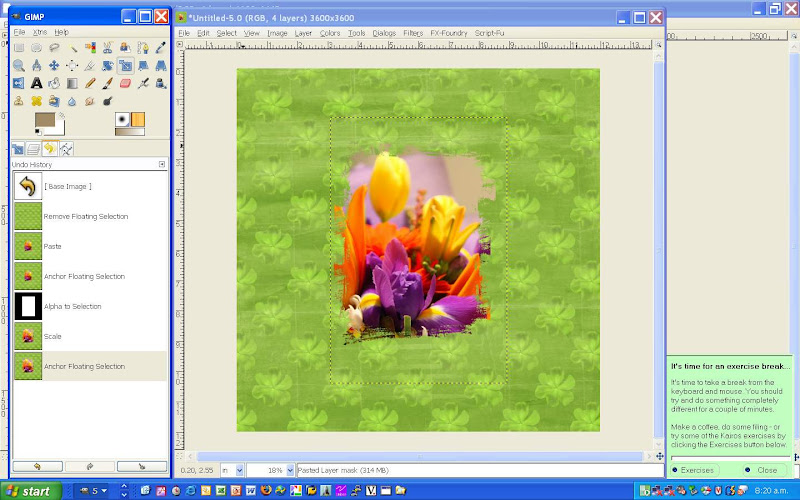
Here is another instalment of a Gimp Digiscrapping tutorial covering the usage of photo masks. This question was posted at ScrapbooksGoneDigital, so have created some screenshots with instructions.

Open your GIMP scrap layout:

From Blogger Pictures
Next open your Mask .png file in a separate window, keeping your GIMP scrap layout also open:
From Blogger Pictures

From Blogger Pictures

From Blogger Pictures

From Blogger Pictures

From Blogger Pictures

See my In training post for the finished LO.

Happy Gimp photo masking everyone

Credits: photomask freebie by Kristin Skjæringrud at http://www.scrapwithtemplates.com/

Sunday, September 7, 2008

Screenshots for GIMP create pencil lined (Highpass) tutorial post

Here are screenshots for my previous post...

From Blogger Pictures
From Butt-kins Web Pages
Credits: Little Dreamer Designs "VintageDreams Retro" paper

Thursday, September 4, 2008

GIMP Digiscrapping Tutorial - "Create pencil lined like drawing in Gimp"

The following is a pretty cool technique to use on your photos and Scrapness over at ScrapbooksGoneDigital asked me how I did this, so here are the instructions.

Start with just a single photo and perform the following instructions:
* duplicate photo layer - apply the following to the copy of photo

* Colors > Invert
* Image > Mode > Grayscale
* set the blending to colour dodge (don't worry if your layer goes all white, the next instruction will reveal all
)
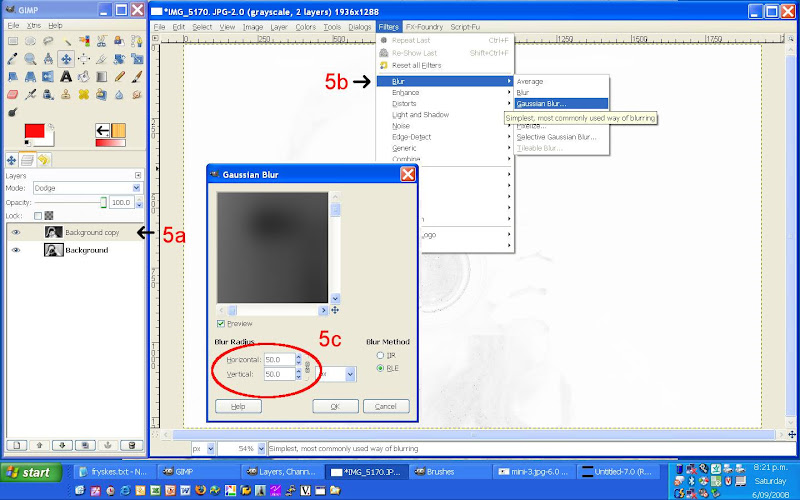
* Filter > Blur > Gaussian blur
- about 50 radius setting
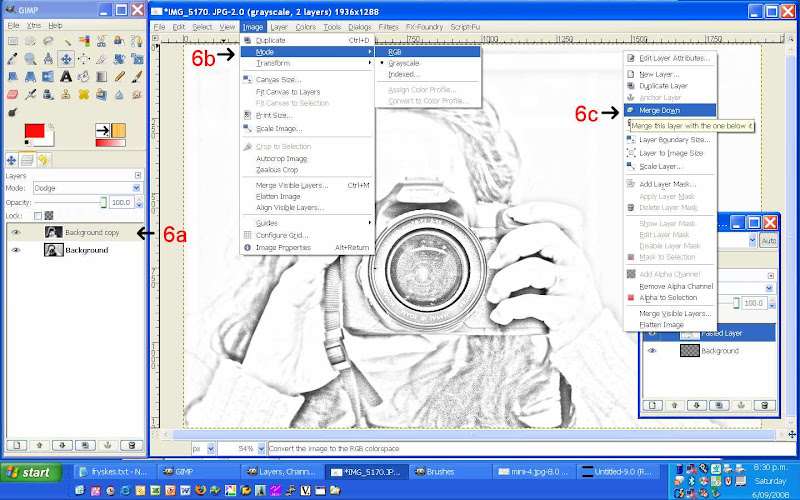
* Image > mode > RGB and merge layer with 1st original photo layer
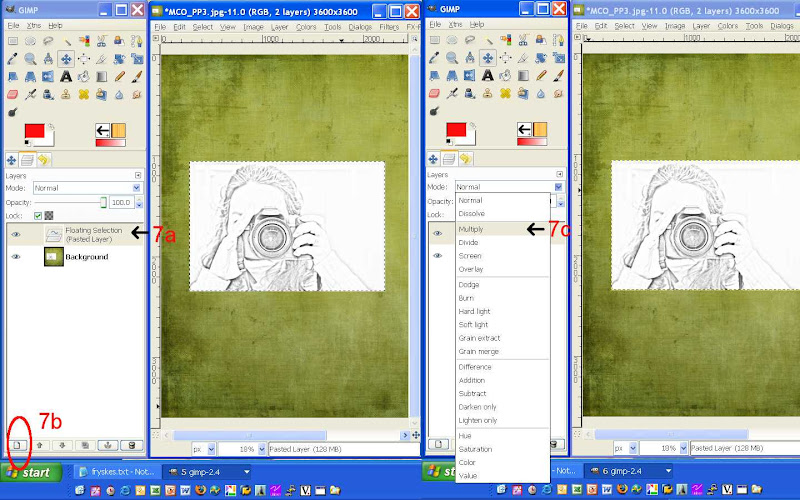
* now add just merged photo to your layout page and set blending to overlay (I used multiple) Happy scrapping

Credits: Meadow kit by Rainbow, heart messystamper by Misty Mareda, chicken wire, tied bow "Believe in" kit by Fryske, dymo font

Wednesday, July 9, 2008

GIMP Digiscrapping Tutorial - "Creating curved Elements"

I don't claim to be an expert on writing a tutorial of any sort, but hopefully you will find this useful. Let me know how you found it as I'm curious, especially how you applied it to your LOs.

I am not a designer, so have created this tut with other people's handy work. Thanks to Gratefull4U kit, yellow Duval Street paper by Elizabeth Quintana and photo frame by by Viviane at http://viviane07.blogspot.com/


Step 1

Open the background paper of your choice in it’s own layer. Create a new transparent layer, use the create new layer button on the Layer dialogue for short cut.


Step 2

From the GIMP main menu, select white as the foreground colour. Select the Rectangle Tool next and click/drag your mouse to draw a narrow rectangle. Fill it with white Foreground colour.


Step 3

From the Filter menu, select Distorts then Curve Bend


Step 4

Click points along the straight line and drag points to represent the desired curve. Select the copy button, this will ensure that the curve is copied to the lower edge of the rectangle, then select OK.


Step 5

Change to the Fuzzy Select Tool and select the white of the curved layer. From the GIMP menu select the 2nd red circled mode, and with your mouse select the space under the white curve and fill with white Foreground colour.


Step 6

Duplicate the solid white curve layer in the Layer dialogue. Add new paper to the layer stack above the duplicate curve layer. Cut new paper from the shape of the duplicate curve layer and Merge Down layer.


Step 7

To create the thin white border between the curve and background paper, select the white solid curve layer. From Layer Menu select Autocrop layer. From GIMP menu select the Alignment Tool, set Offset to -20, and select bottom right Distribute button.


This tutorial can be applied to curving text and other elements such as straight stitching too.