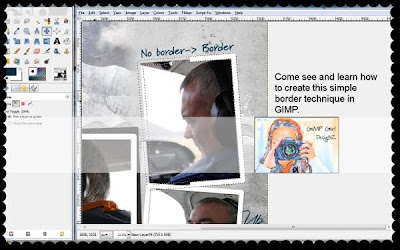
I hadn't noticed this menu option before until I worked on my recent layout and played with it. It's called "Border" and you'll find it under the "Grow" option on the Select menu.
Some simple instructions as follows:
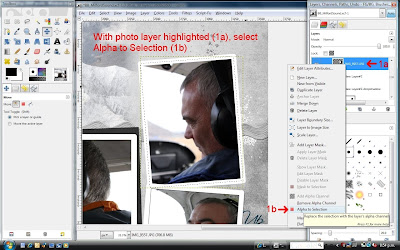
1. Select photo layer, do Alpha to Selection,
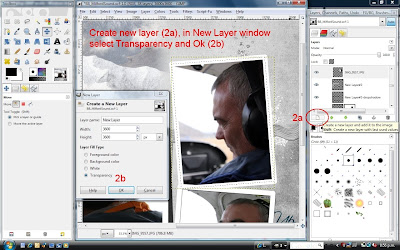
2. Create new transparent layer,
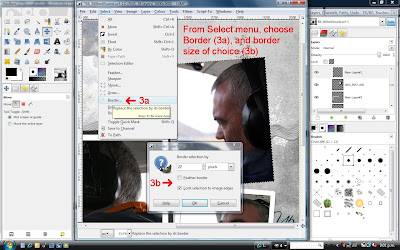
3. Ensure that new layer is selected now, go to Select menu > Border, In pop-up window set border size to your liking,
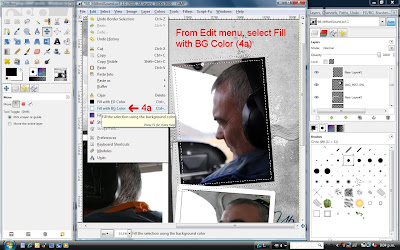
4. Edit menu > Fill with BG color (default is set to white),
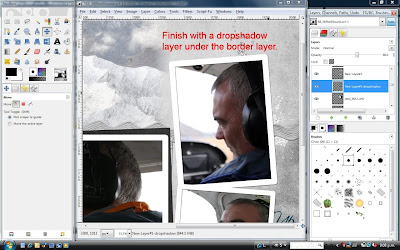
5. Add dropshadow layer if you wish and you are done.
Hopefully the following screenshots are easy to follow in using this border feature. Let me know how you find it if you like, I sure found it useful.
TIP - Click on each screenshot for closeup.


3 comments:
hI! I Want to kmow how can i do to use the templates on gimp, because on photoshop is really easy, but on gimp i don´t know..you can help me? my e-mail: nicolehevila@hotmail.com..
Hello ..me again..just used your frame tut..thanks what an easy way to make a frame for odd shapes..instead if using lasso tool to trace..awesome..thanks...ok I was wondering if you could show me how to take a 2400 x 2400 template and re size to 3600....now I have used the image canvas to change the canvas size ..and then used the layers re size but sometimes the elements or frames are cropped to themselves(know what I mean..there is no extra transparency)do I make sense here...lol any help would be appreciated nanascraps1956@yahoo.com
Hi Mo! I am just learning Gimp and I'm on a Mac...can't get the menu to pop up to select "Alpha to Selection".... any thoughts? Thanks!
Post a Comment