Wednesday, July 30, 2008
Well done Colin

Tuesday, July 29, 2008
Our boy, GIMPed

Friday, July 25, 2008
What a GIMP Geek!
Oh, and what do you think of those gorgeous blooms, a surprise gift of hubby on my birthday of course!


Wednesday, July 23, 2008
Happy Birthday to ME!


Wednesday, July 16, 2008
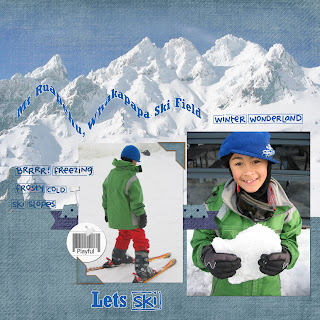
Our next skiing holiday is now booked

Yeah, we are going skiing again. Accommodation all booked out for long weekend next month. This year we have got a place in Ohakune it self, so we will be visiting Turoa Ski Field. The plan is that Brian's sister and family will join us too, but we have had to change their preferred date from early September to late August. Hopefully this will still work out for them, if not we will have spare accommodation as the place sleeps 9. Just as well we are getting this for a good rate. As you can imagine we are all so looking forward to this.
LO Credits: MBblogfreebie kit by Mandy Mystiques Design, Fonts: 2Peas Blocks - Winter and Rockwell Condensed and my own GIMP tutorial to create the curved text.
Saturday, July 12, 2008
A Beautiful meal to finish the week with a glass of Black Chook
some layouts again


credits lo1: All Work in Progress alphas by Vicky at http://vicki20.blogspot.com/,
Love in Paris kit by by Mhulshoff for SYTYCD at http://scraporchard.com/
credits lo2: papers by digitreats, scrapalinquent, imaginebyfran, twoboyz00, NSD template by Kami at ScrapOrchard, bracket from Duval Street kit by scrapalinquent
Thursday, July 10, 2008
Sunday morning bagels


Wednesday, July 9, 2008
GIMP Digiscrapping Tutorial - "Creating curved Elements"
I am not a designer, so have created this tut with other people's handy work. Thanks to Gratefull4U kit, yellow Duval Street paper by Elizabeth Quintana and photo frame by by Viviane at http://viviane07.blogspot.com/

Step 1

Step 2
From the GIMP main menu, select white as the foreground colour. Select the Rectangle Tool next and click/drag your mouse to draw a narrow rectangle. Fill it with white Foreground colour.
Step 3
From the Filter menu, select Distorts then Curve Bend

Step 4
Click points along the straight line and drag points to represent the desired curve. Select the copy button, this will ensure that the curve is copied to the lower edge of the rectangle, then select OK.

Step 5
Change to the Fuzzy Select Tool and select the white of the curved layer. From the GIMP menu select the 2nd red circled mode, and with your mouse select the space under the white curve and fill with white Foreground colour.
Step 6
Duplicate the solid white curve layer in the Layer dialogue. Add new paper to the layer stack above the duplicate curve layer. Cut new paper from the shape of the duplicate curve layer and Merge Down layer.

Step 7
To create the thin white border between the curve and background paper, select the white solid curve layer. From Layer Menu select Autocrop layer. From GIMP menu select the Alignment Tool, set Offset to -20, and select bottom right Distribute button.

This tutorial can be applied to curving text and other elements such as straight stitching too.
You want a GIMP Digiscrap tutorial?
Tuesday, July 8, 2008
The little digger that could!

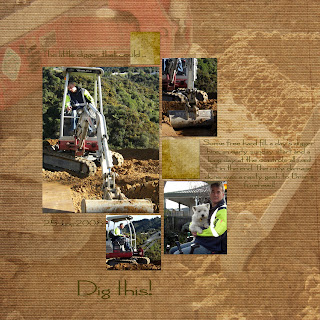
I nearly forgot I had done this LO last month. Brian was very keen to get working on shaping the free fill that got delivered over a week's time. I can't remember how many loads we got, but 10 small trucks for sure! So Brian decided to do the job himself by hiring a digger from our local Hire Pool. On the first day of driving the digger, Brian found it took the whole morning to get the hang of it again. So of he went driving and digging and I carried on with other jobs as Brian looked comfortable handling the digger. Unfortunately the digger had the last word, trying to even out the fill, the digger launched forward as Brian was driving over the uneven surface, and he fell forward out of his seat. Then the digger right itself, but Brian was still falling forward. His head got cut in the process, colliding with the digger arm. As you can guess, nasty gash and lots of blood. Just as well I was handy near the house, we stopped the bleeding with rags and medical kit supplies as Brian didn't want to end up at A & E for the afternoon while having forked out for digger hire. Men!
After a clean up and patch up by me, he went back on the digger to get on with the job he started. Only damage done his split forehead, and I a stress headache watching him for the rest of the afternoon...
Monday, July 7, 2008
Bye bye PowerShot A85, hello Canon D40 DSLR
My work has been totally stressful so not as much scrapping done as I would have liked, but having the new camera sure makes me want to scrap again.
Life has been hectic, Brian has been busy cementing retaining wall posts and installing the kitchen splashback. Unfortunately after only 4 hours on the wall, one small piece decided to crack by itself while Brian was admiring his handy work, bugger! We ensured that the same piece this time was toughened, so the 2 cut outs weren't going to give us the same trouble.
Now for some new camera photo shots...


